Looking to give your home a budget-friendly refresh with natural wood tones and modern warmth? Whether you’re tackling a DIY kitchen upgrade, a stylish built-in project, or a budget-conscious furniture revamp, Shinnoki Milk Oak is a stunning and cost-effective option. Inspired by Joanna Gaines’ love for approachable, beautiful design, this step-by-step guide will walk you through how to incorporate Shinnoki Milk Oak into your home—without breaking the bank.
Step 1: Understanding Shinnoki Milk Oak & Why It’s a Great Choice
Before jumping into your DIY project, let’s take a quick look at why Shinnoki Milk Oak is a game-changer: ✔ Pre-finished & Ready to Use – No need for staining or sealing. ✔ Sustainable & Durable – Engineered from real wood veneer for an eco-friendly yet strong finish. ✔ Easy to Work With – Suitable for DIY cabinets, shelves, furniture, and accent walls. ✔ Modern Aesthetic – A warm, light-toned wood with a soft grain that complements many home styles. ✔ Budget-Friendly Alternative – Achieves a high-end look without the high-end price.
💡 Pro Tip: Shinnoki Milk Oak pairs beautifully with white, black, and deep green cabinets for a timeless yet contemporary look.

Step 2: Choosing the Right DIY Project
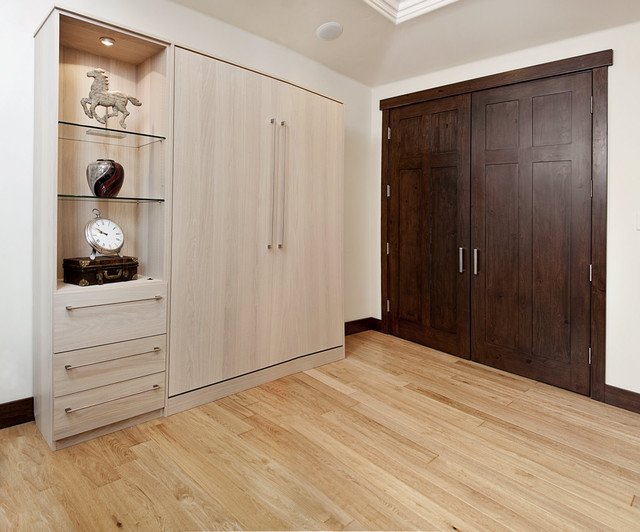
The versatility of Shinnoki Milk Oak makes it perfect for various home improvement projects. Here are some budget-friendly ways to use it:
✔ DIY Kitchen Cabinet Makeover – Replace cabinet doors or apply veneer panels for a fresh, modern look. ✔ Floating Shelves & Open Storage – Stylish and functional, great for kitchens and living rooms. ✔ Custom Closet Organization – Create sleek shelving and drawer fronts for a high-end, built-in feel. ✔ Accent Wall or Paneling – Adds warmth and texture without overwhelming a space. ✔ DIY Coffee Table or Dining Table Top – An affordable way to create custom, high-quality furniture. ✔ Built-in Desks & Home Office Solutions – Stylish and budget-conscious for a productive space.
💡 Pro Tip: If you’re new to DIY, start with smaller projects like floating shelves or a tabletop before moving on to cabinetry.
Step 3: Gathering Your Tools & Materials
To successfully work with Shinnoki Milk Oak, you’ll need the right tools. Gather these essentials: ✔ Shinnoki Milk Oak Panels or Veneer Sheets – Order pre-cut or full sheets depending on your project. ✔ Circular Saw or Table Saw – For precision cuts on larger panels. ✔ Edge Banding & Trim Router – If working with veneer, use matching edge banding for a seamless look. ✔ Wood Glue & Clamps – Essential for bonding panels securely. ✔ Sanding Block (Fine Grit) – Smooths out rough edges and ensures a professional finish. ✔ Drill & Screws – For installing shelves, cabinet doors, or furniture assembly. ✔ Measuring Tape & Level – To ensure straight, even installations. ✔ Soft Cloth & Wood Cleaner – For a final clean and polished look.
💡 Pro Tip: Pre-plan your cuts to minimize waste and save material costs.

Step 4: Cutting & Preparing the Wood
- Measure Twice, Cut Once – Use precise measurements before making any cuts.
- Mark Your Cuts with Painter’s Tape – This prevents splintering when using a saw.
- Use a Fine-Tooth Blade – For smooth, clean edges, especially on veneer panels.
- Apply Edge Banding (If Needed) – Use a trim router or iron-on banding for a polished finish.
- Lightly Sand the Edges – Smooth out any rough areas for a professional look.
💡 Pro Tip: When cutting large panels, use a straightedge guide with your saw for clean, even cuts.
Step 5: Assembly & Installation
Depending on your project, here’s how to put it all together: ✔ For Cabinets & Shelving: Use hidden brackets or pocket screws for a seamless look. ✔ For Furniture Projects: Secure panels with wood glue and clamps before fastening with screws. ✔ For Wall Paneling: Use construction adhesive and a nail gun to mount securely. ✔ For Floating Shelves: Install with heavy-duty shelf brackets for durability.
💡 Pro Tip: Before securing everything permanently, do a dry fit first to ensure proper alignment.
Read More in RSVP Home Blog
- Step-by-Step Guide to Choosing Laminate Flooring for Entertaining & Hosting
 Transform your entertaining space with stylish and durable laminate flooring. This step-by-step guide covers design trends, DIY installation, and maintenance tips to create a welcoming home for hosting.
 - Home Improvement in Sacramento: A DIY and Budget-Friendly Journey
 Home improvement in Sacramento doesn’t have to be expensive! Follow this budget-friendly DIY guide to remodel your kitchen, bathroom, flooring, and outdoor space—without breaking the bank.
 - Shinnoki Cabinets: A Stylish & Functional Upgrade for Entertaining at Home
 Designing a home built for entertaining? Shinnoki cabinets offer modern style, durability, and effortless upkeep, making them ideal for kitchens, dining areas, and home bars. See how they compare to traditional cabinets in this Chip Gaines-inspired guide.
Step 6: Finishing Touches
✔ Clean the Surface – Wipe down with a soft cloth and mild cleaner. ✔ Seal the Edges (Optional) – If using raw veneer edges, apply a finishing wax or polyurethane for protection. ✔ Style & Decorate – Pair your Shinnoki Milk Oak with minimalist hardware, cozy textiles, and matte finishes. ✔ Enjoy Your DIY Creation!
💡 Pro Tip: To maintain its natural beauty, avoid harsh chemicals when cleaning Shinnoki Milk Oak.
Final Thoughts: A Beautiful, Budget-Friendly Upgrade
With Shinnoki Milk Oak, you don’t have to spend a fortune to achieve a high-end look. Whether you’re refreshing cabinets, building custom furniture, or adding warmth with shelving, this material provides a stunning finish that’s DIY-friendly and cost-effective.
✔ Pre-finished for easy installation and a professional look.
✔ Perfect for DIY cabinetry, shelving, and accent pieces.
✔ A budget-conscious way to achieve a high-end wood finish.
✔ Matches seamlessly with modern, farmhouse, or minimalist designs.
So, ready to transform your home with a touch of modern wood elegance? Grab your tools and get started today!